Quickstart
This guide walks you through installing Fabricate, creating your first crafting system, enabling gathering, configuring a gathering environment, and trying it as a player.
Installation
- In Foundry VTT, go to Add-on Modules
- Click Install Module
- Search for “Fabricate” or paste the manifest URL
- Click Install
- Enable the module in your world
Which channel am I on?
Fabricate ships through three channels: the public registry, a private closed-beta channel, and a private patron early-access channel. The channel you are on is fixed at install time — it is the manifest URL you installed from. If you are a tester or a patron and want to move between channels (for example from early access to public, or from beta to early access), the only supported route is to uninstall Fabricate and reinstall from the other channel’s manifest URL. Foundry will never offer that switch as an in-place update: a private channel is deliberately not advertised as an upgrade of the public one, so its testers and patrons are never quietly moved off it.
Theme
Fabricate defaults to the Fabricate colour theme, which looks super cool. If for some reason it’s not right for your game, the module also includes six additional themes:
- Mythwright
- Ironblood Forge
- Hearth & Herb
- Starglass Arcana
- Sovereign
- Foundry Native
Open Foundry’s module settings for Fabricate and set Fabricate Theme to switch palettes. Changing the theme updates open Fabricate app windows immediately.
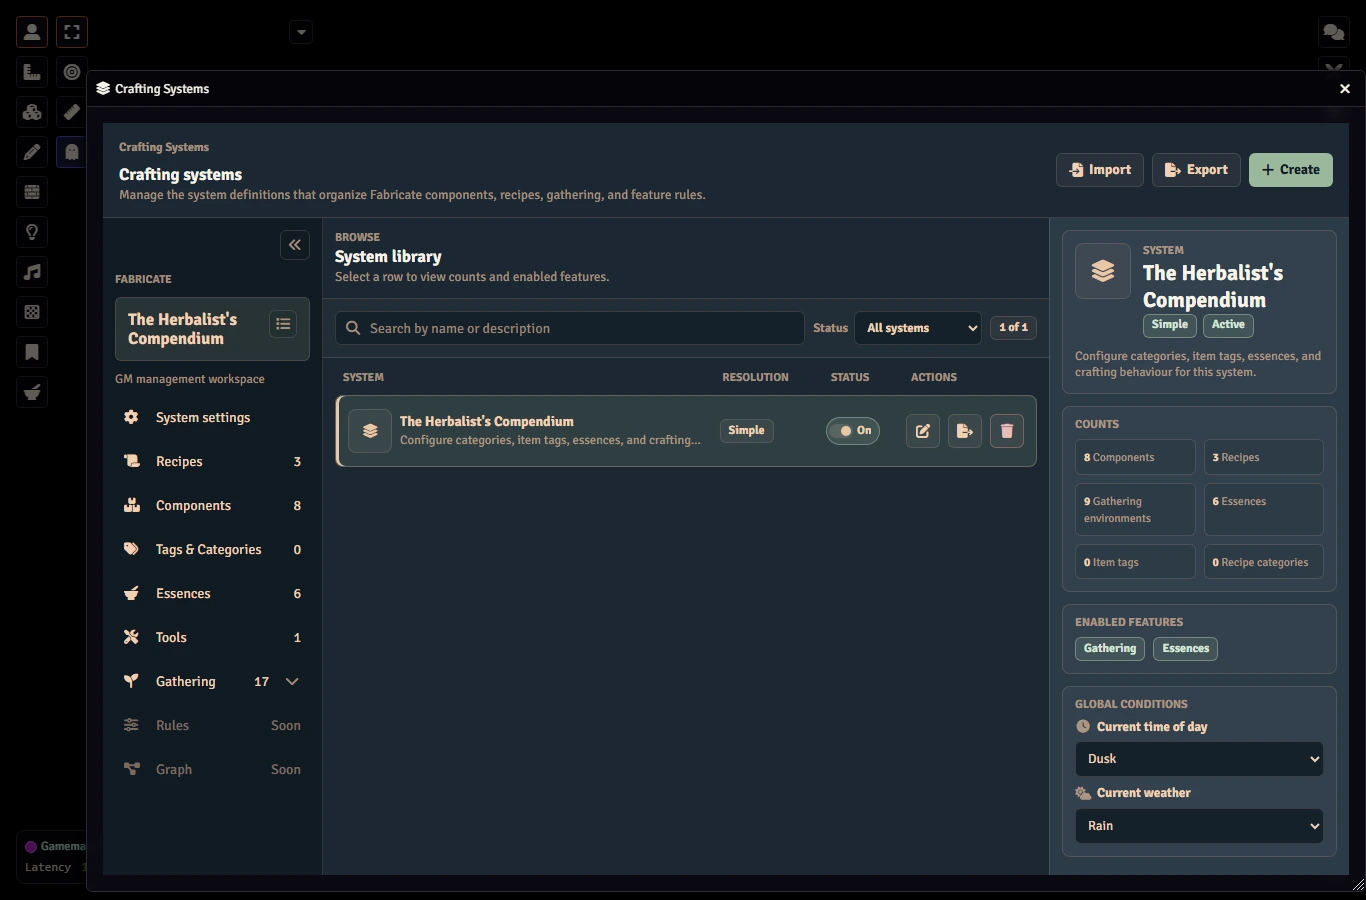
Foundry Native is a fixed Fabricate palette inspired by Foundry. It is designed to sit closer to Foundry’s default visual language, but it does not dynamically follow your active Foundry skin or third-party Foundry theme.
Step 1: Take a Quick Tour of Fabricate
Open the Items sidebar on the left side of Foundry. You’ll see three new header buttons:
- Craft Item (all users): opens the unified Fabricate window on the Crafting tab, where players browse recipes, pick an actor and component sources, and craft.
- Gathering (all users): opens the unified Fabricate window on the Gathering tab.
- Manage Crafting Systems (GM only): opens the Fabricate GM admin panel.
When no crafting systems are enabled, players do not see the Craft Item or Gathering buttons.
The unified Fabricate window also has a Journal tab where players monitor the runs their characters have started across crafting, gathering, and salvage, and continue crafting runs. See Journal.
Step 2: Create a Crafting System
All crafting system editing requires the GM role.
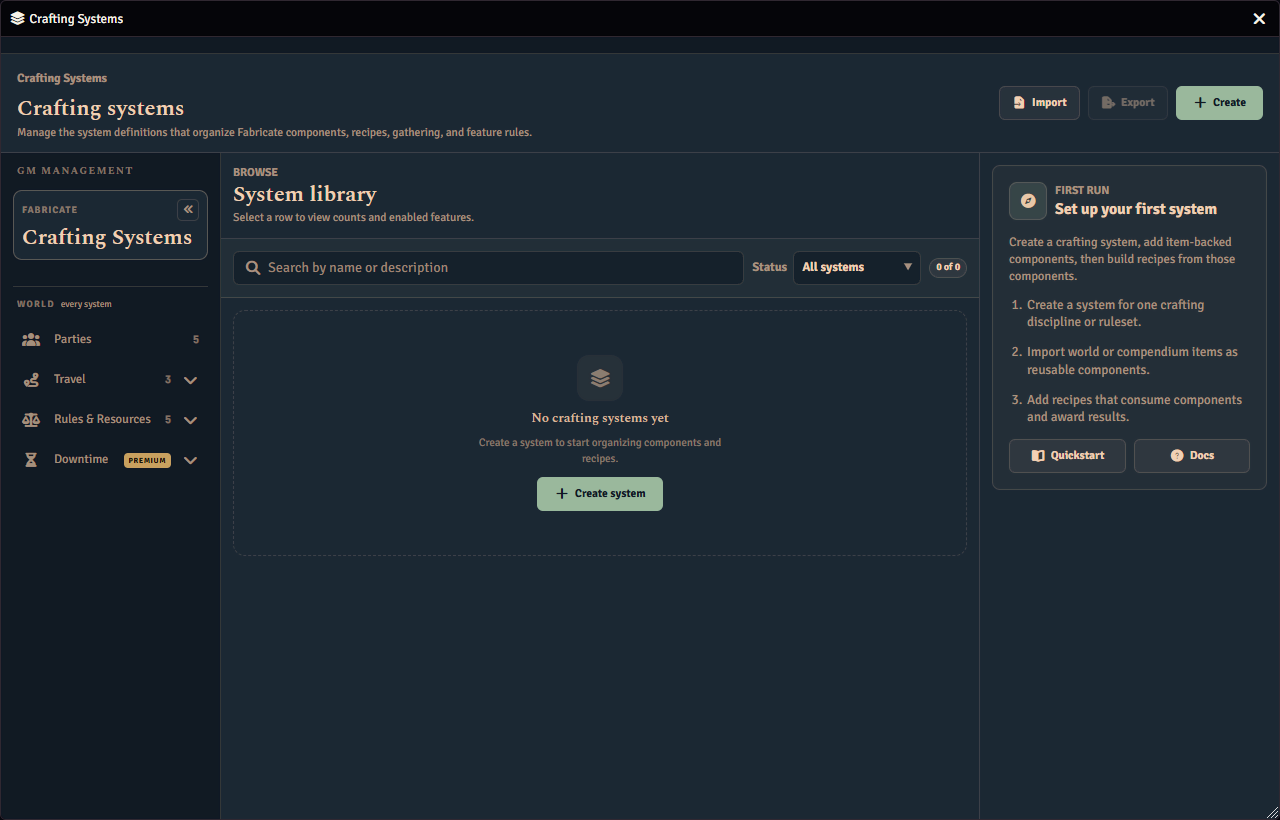
- Click Manage Crafting Systems
- In the Systems tab, click Create System
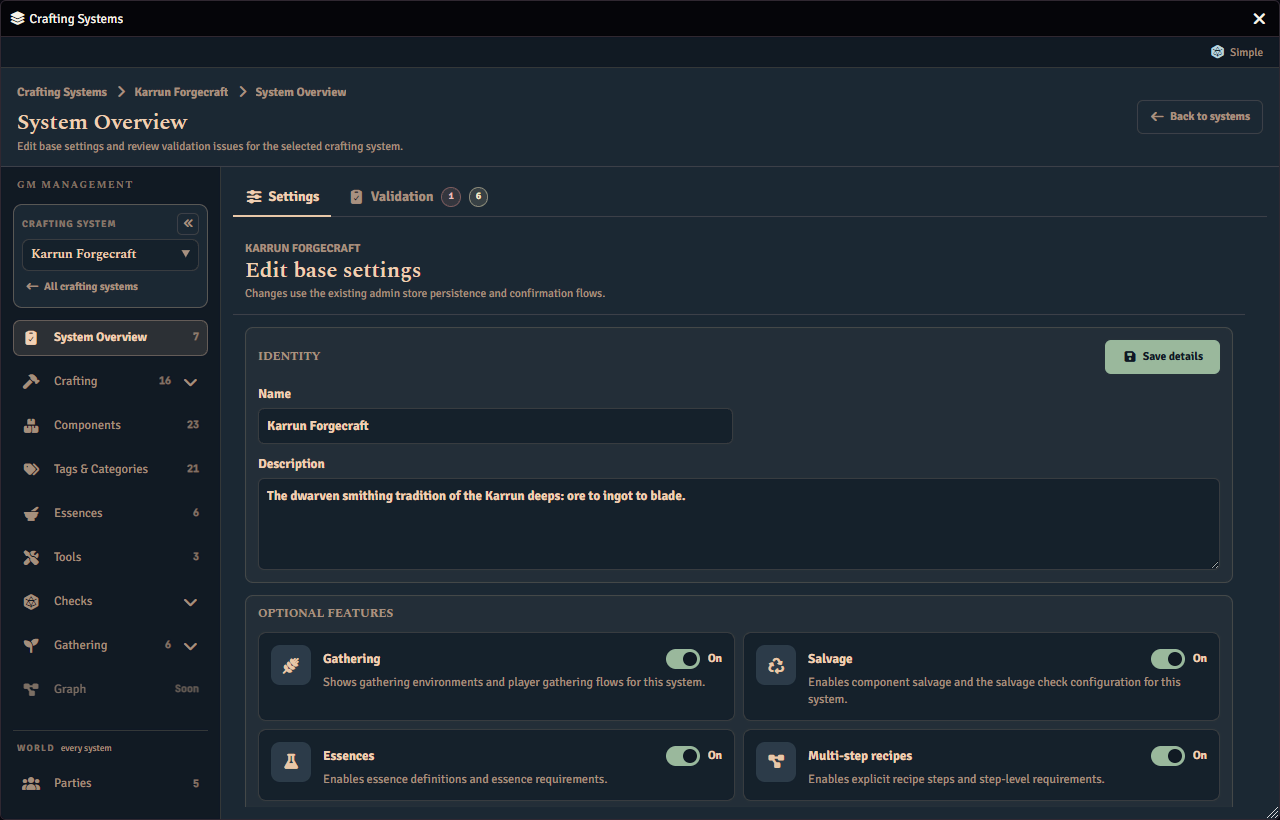
- Give it a name (like “Runesmithing” or “The Herbalist’s Compendium”) and a description
- Set the Resolution Mode to “Simple” for now
- Enable any optional features you want (essences, multi-step recipes, etc.)
- Save it
Step 3: Add Components
Fabricate recipes reference Components. These are items imported into your crafting system’s library. So long as you use that same world or compendium item, or copies of it, to create new instances, Fabricate will recognize it as the original component, even if it is renamed.
- In the GM admin, open the Components page
- Drag items from the Items sidebar or a compendium into the components drop zone
- Your item is now registered as a Fabricate component
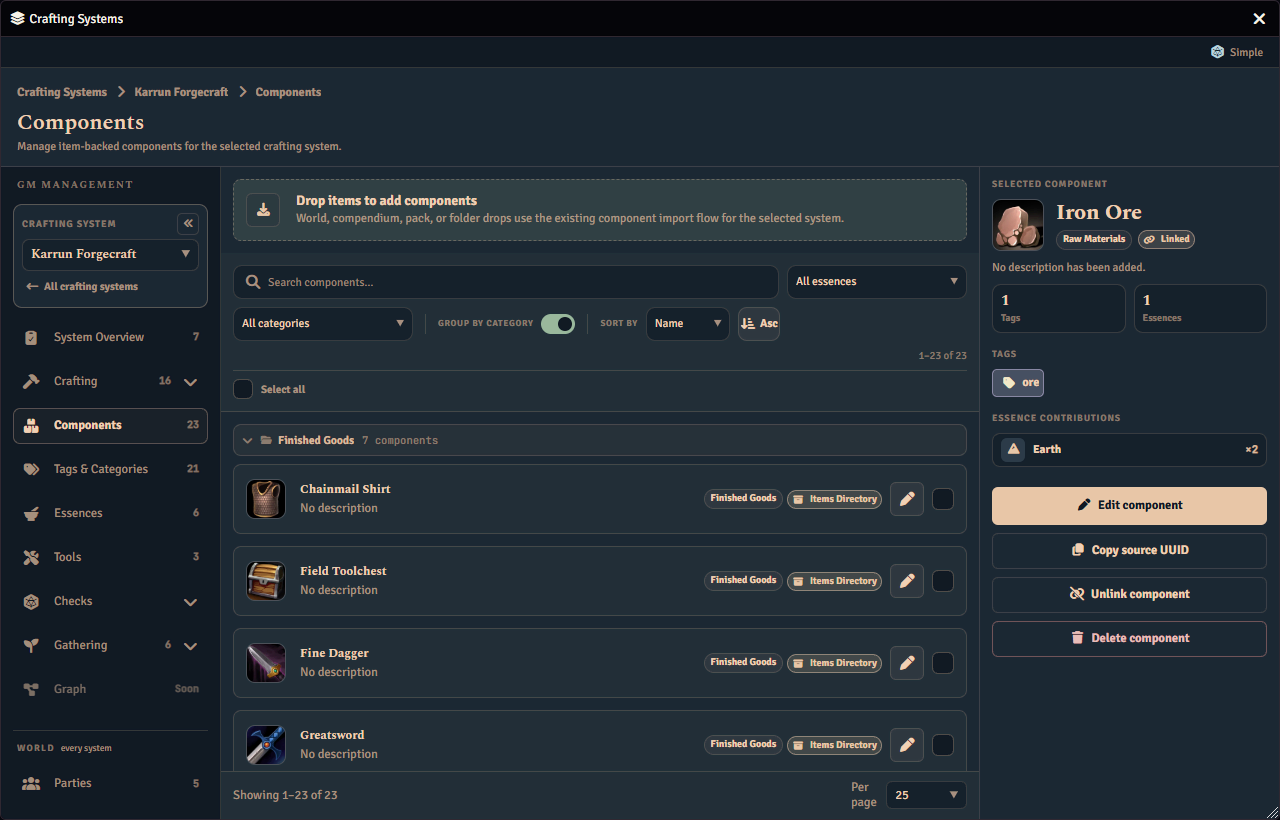
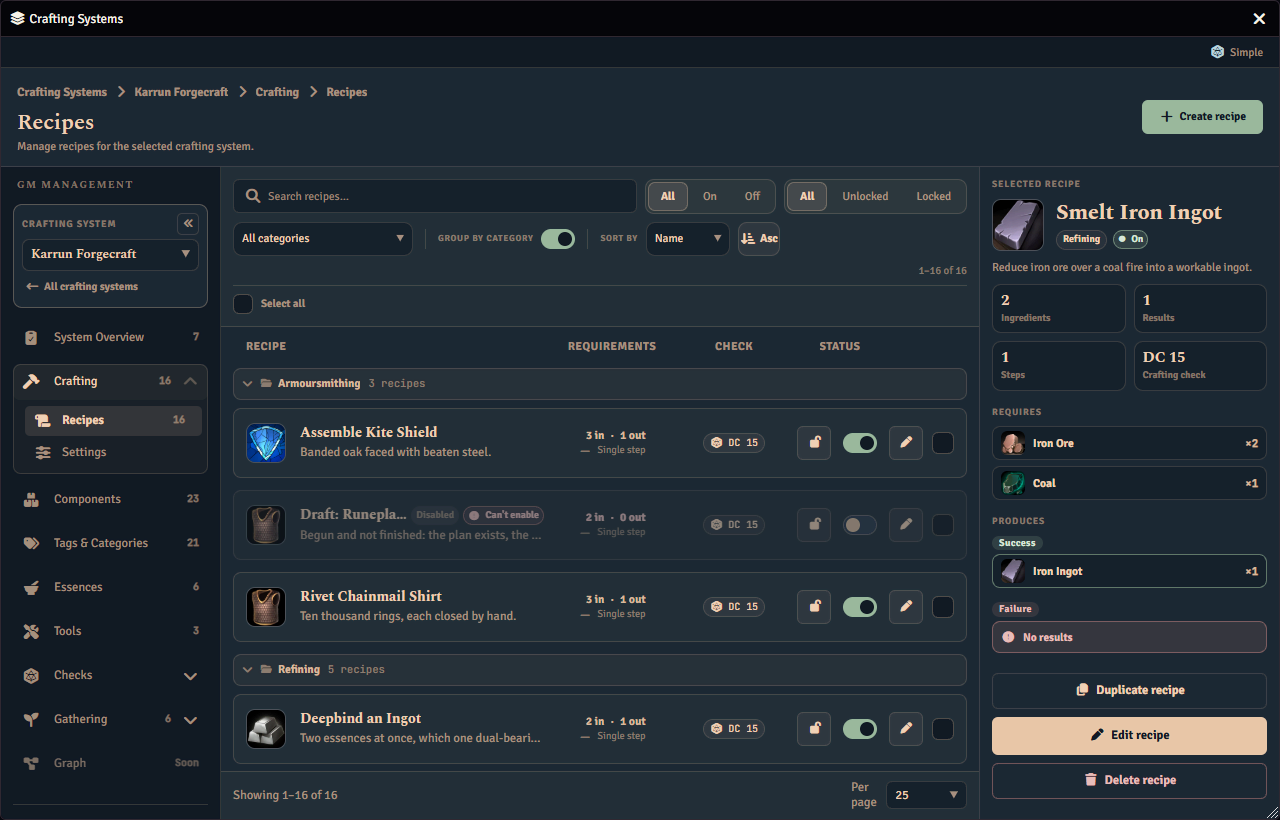
Once you start adding recipes, the Crafting page lists every recipe the system holds.
Step 4: Create a Gathering Environment
Gathering lets actors collect materials from your component library at places you define. It is opt-in per crafting system.
- In the GM admin, open System Overview and turn on the Gathering optional feature, on the same card you saved in Step 2
- Open Environments under Gathering and click Create Environment
- Give it a Name and optional Description (like the “Azure Grove” or “Sunken Ruins”)
- Choose a Selection Mode:
- Targeted shows players a list of tasks to attempt
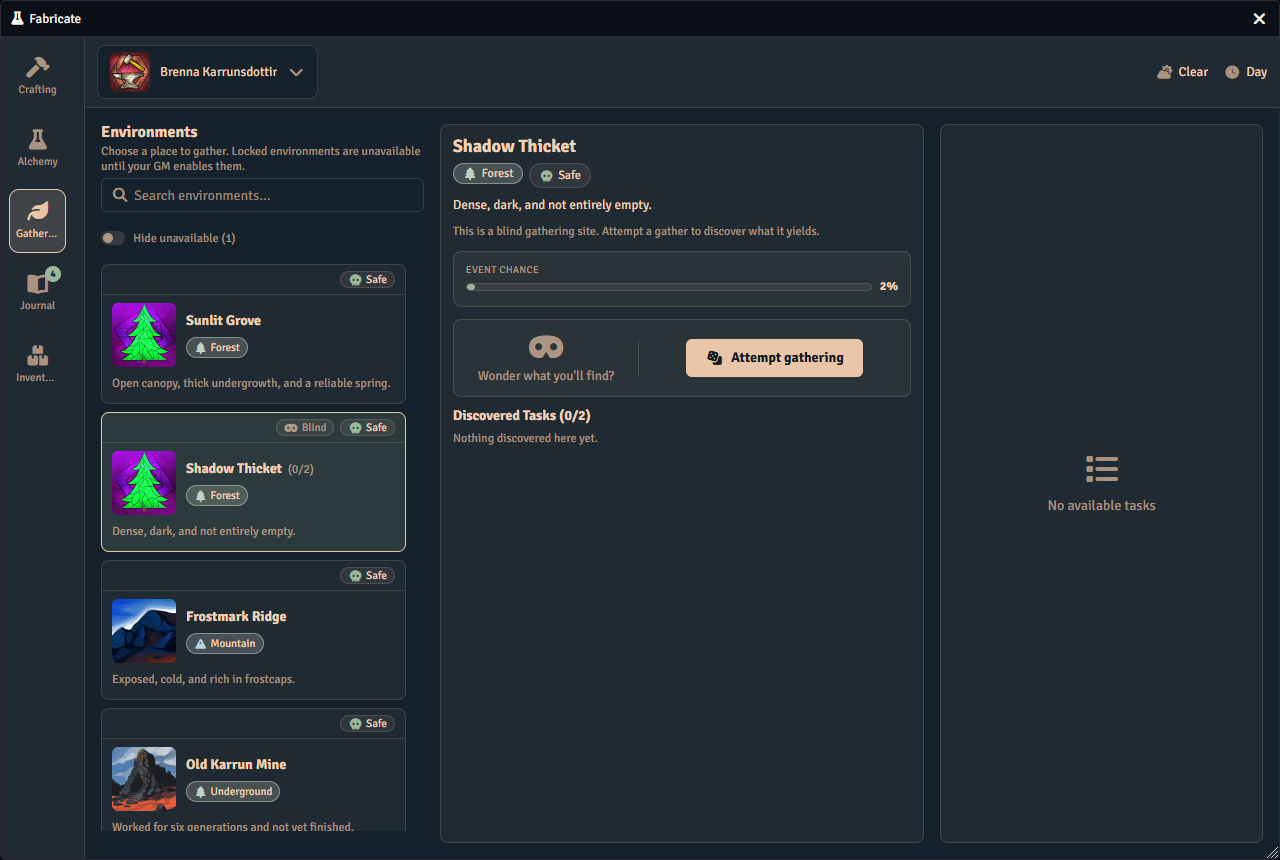
- Blind shows a single opaque gather action that resolves a hidden task at random
- Select a danger level for the environment (used to match tasks and events)
- Optionally add Biome tags (also used in matching) and/or link a Scene to gate gathering in that environment
- If you like, give your environment an image
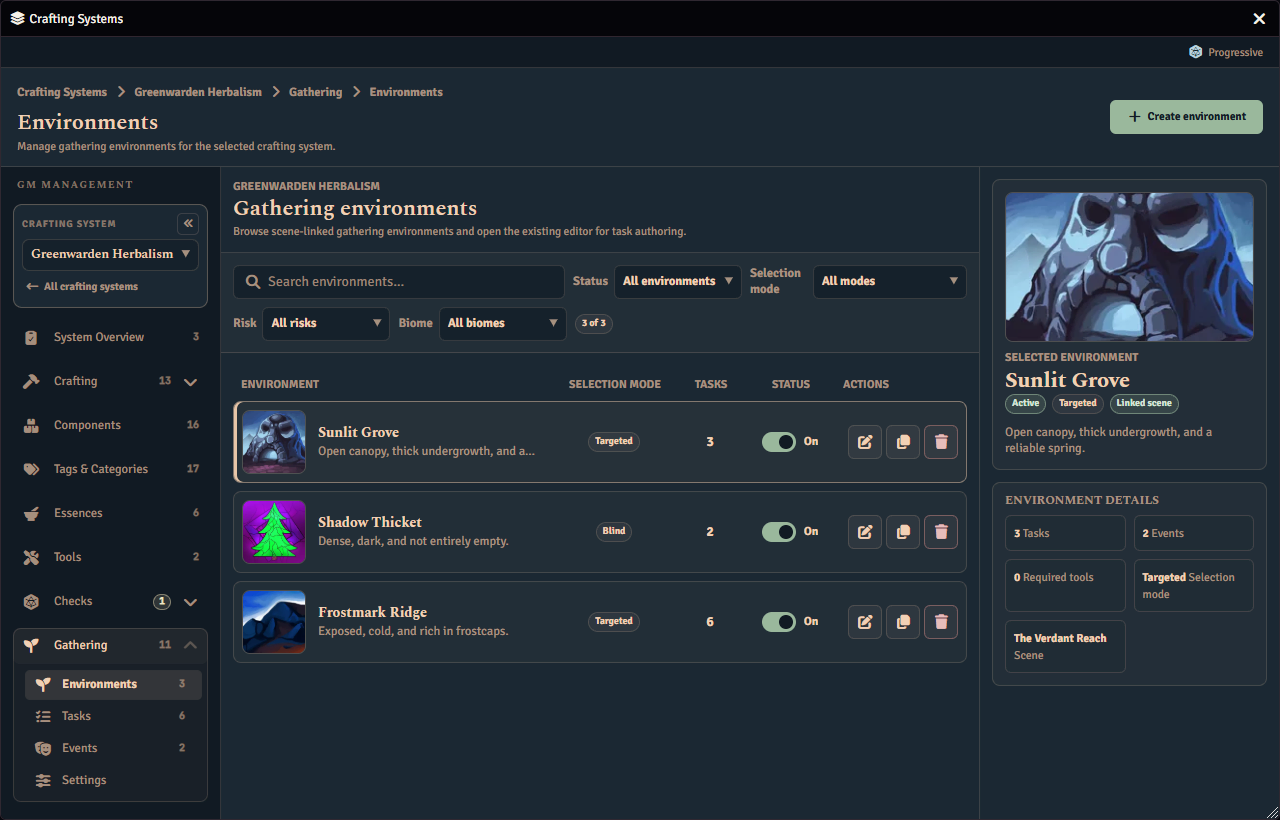
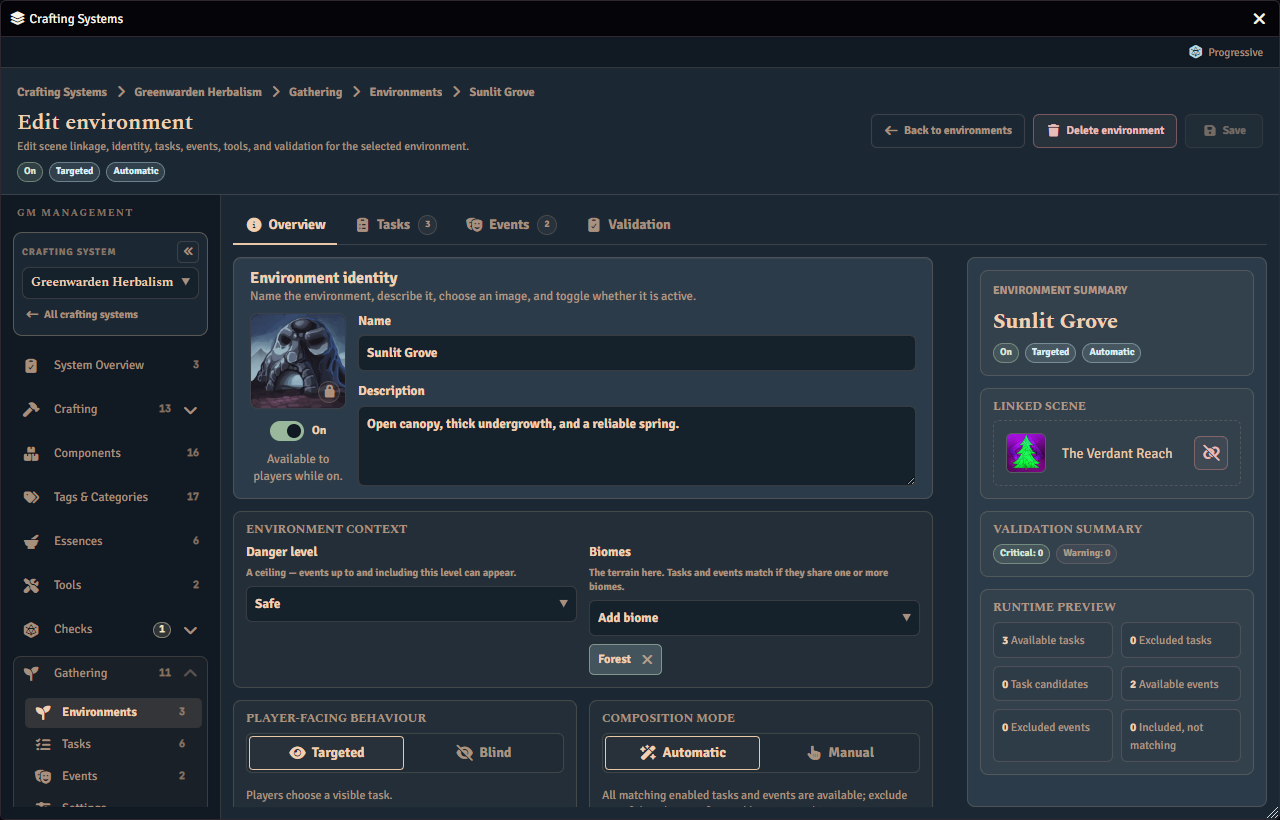
New environments without a gathering task are created as disabled draft shells. We’ll enable it in Step 7 once it has some content. See Gathering Environments for the full field reference.
Step 5: Create a Gathering Task
Gathering Tasks define what can be gathered, and what the chance of finding a specific component is. They are authored once and composed into environments.
- Open the Tasks tab under Gathering and create a task
- Give it a Name and optional Biomes (empty means “matches any biome”)
- Add Drop rows. These are (optionally) ordered rows, each pointing at a component with a quantity and a drop rate from 0 to 100. The drop row order is the rank used by the system’s Gathering Rules when you choose “Highest ranked successful drop” in the gathering reward rules.
- Optionally set a Stamina cost, a gathering roll modifier, Weather/time of day gates, and any Required tools from the system’s Tools library
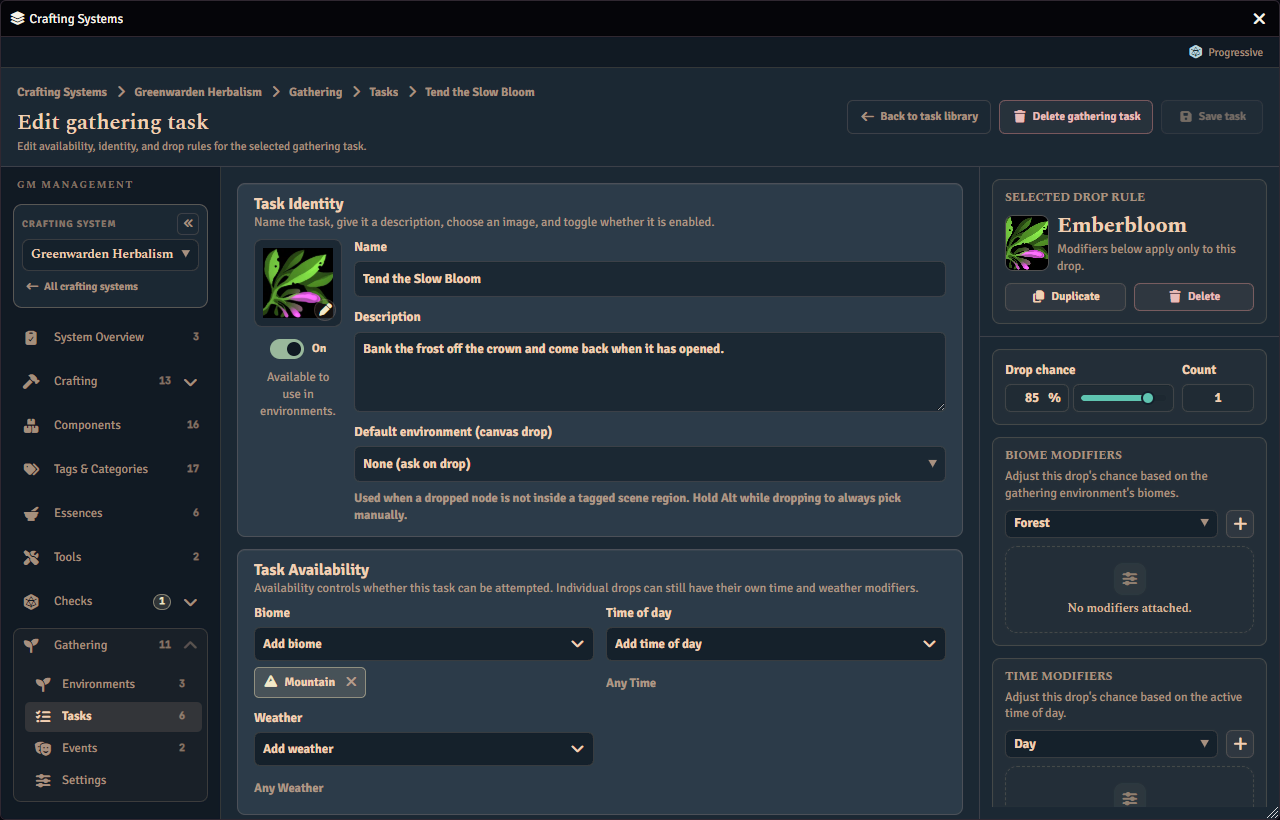
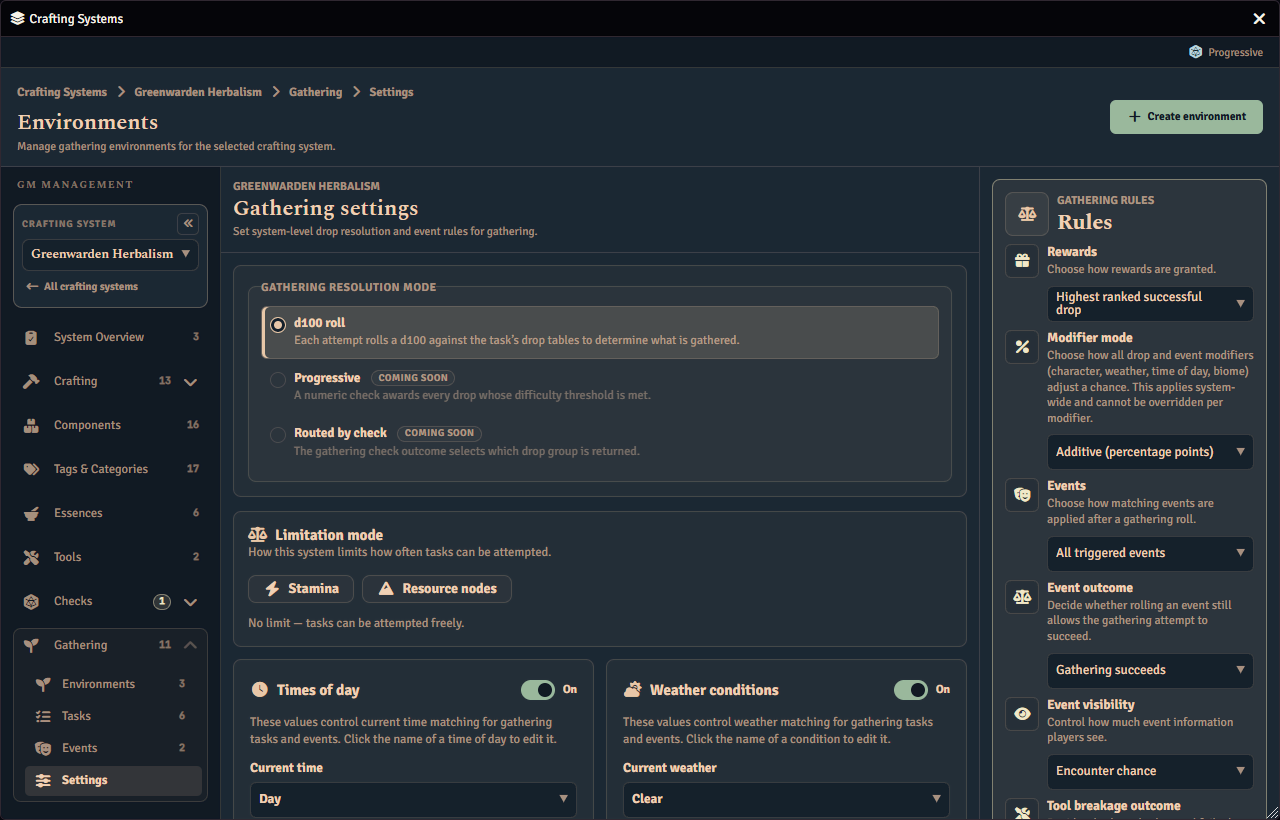
Stamina costs, modifiers, and drop rates accept formulas (numbers, ability modifiers, dice). See Expressions for D&D 5e and Pathfinder 2e examples.
Step 6: Create a Gathering Event
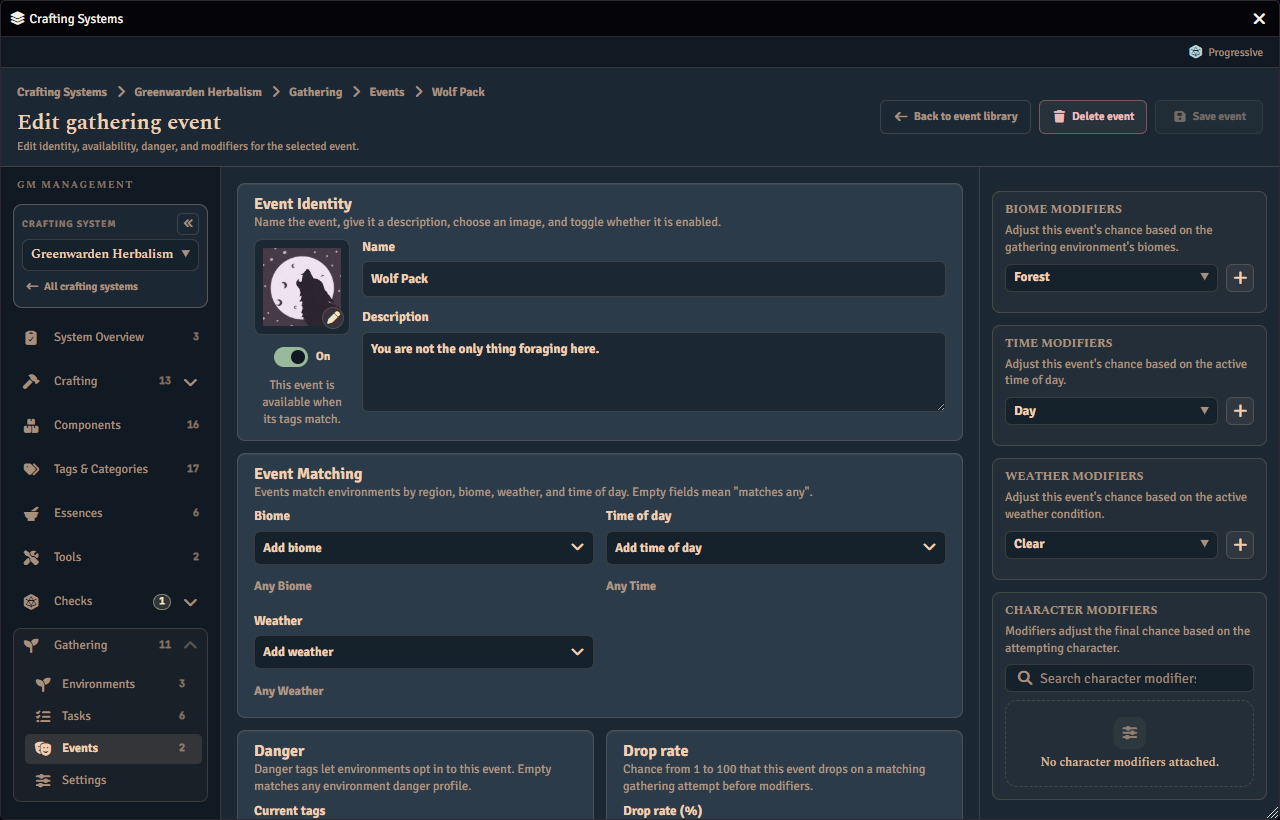
Events define what can happen alongside a gathering attempt. They add flavour, complications, and can even cause a gathering attempt to fail.
- Open the Events tab under Gathering and create an event
- Give it a Name and optional Danger and Biomes match tags (empty means “matches any”)
- Set a Drop rate from 1 to 100. That’s the chance the event triggers on a gathering attempt
- Optionally add one or more roll modifier and Weather/time of day gates
How a triggered event affects the attempt is controlled by the system’s Event outcome rule:
- Gathering succeeds will surface the event, whilst still awarding the task’s gathering results (if it has any)
- Gathering fails will surface the event, but no rewards are awarded, regardless of the task outcome
Step 7: Configure the Gathering Environment
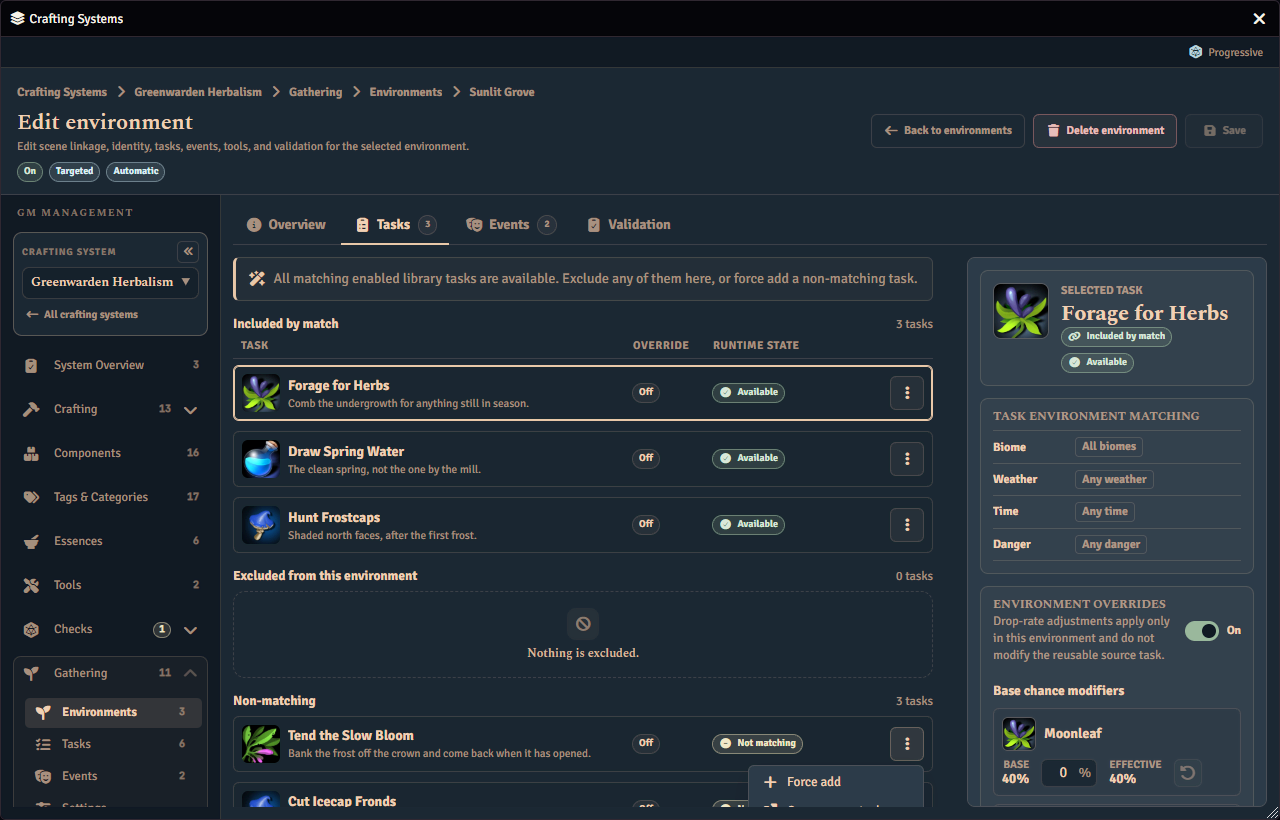
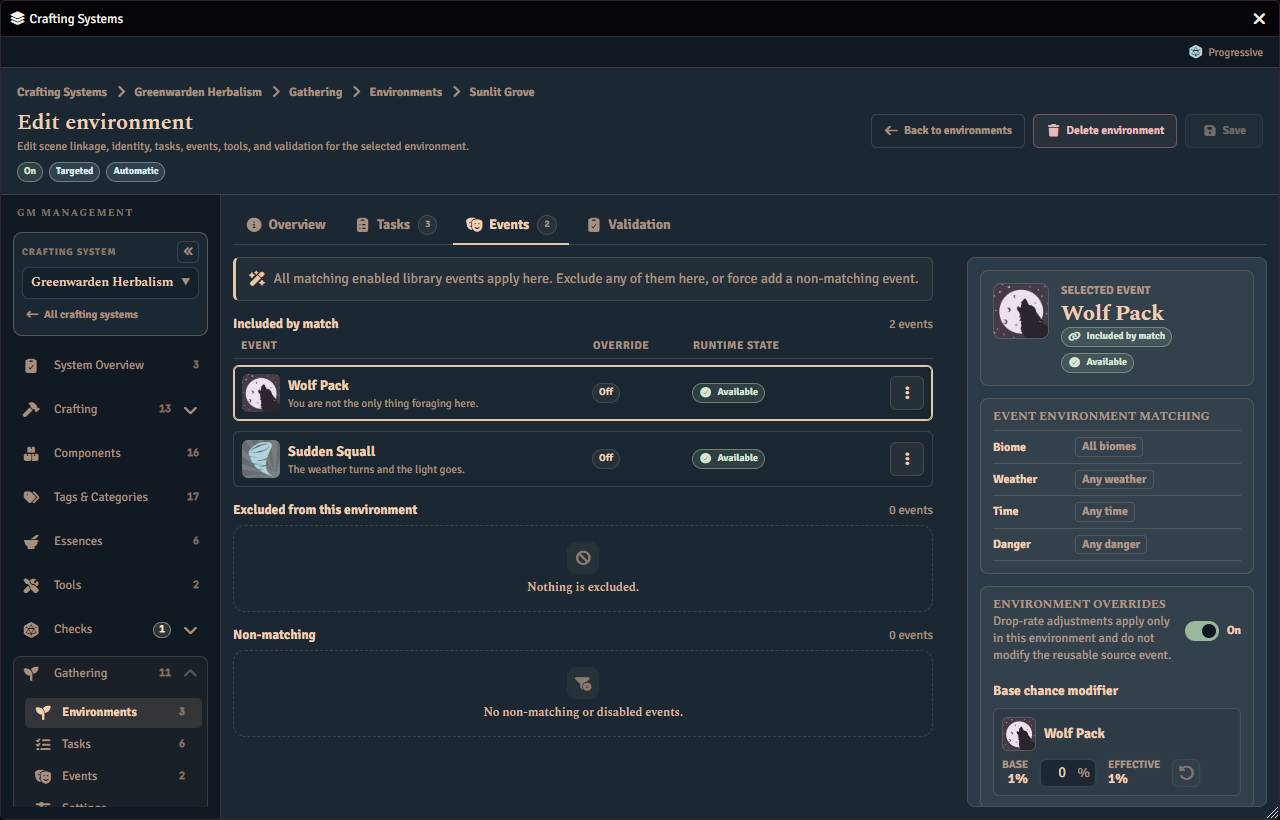
Return to the Environments tab and select the environment from Step 4 to add your tasks and events into it.
- In the environment’s Overview, set a Composition mode:
- Automatic: every matching, enabled task and event applies unless you explicitly exclude it, and you can Force add a non-matching one
- Manual: only the tasks and events you explicitly add apply, matching or not
- On the Tasks and Events tabs, confirm the tasks and events you want are included for this environment
- Enable the environment and save
Step 8: Gather as a Player
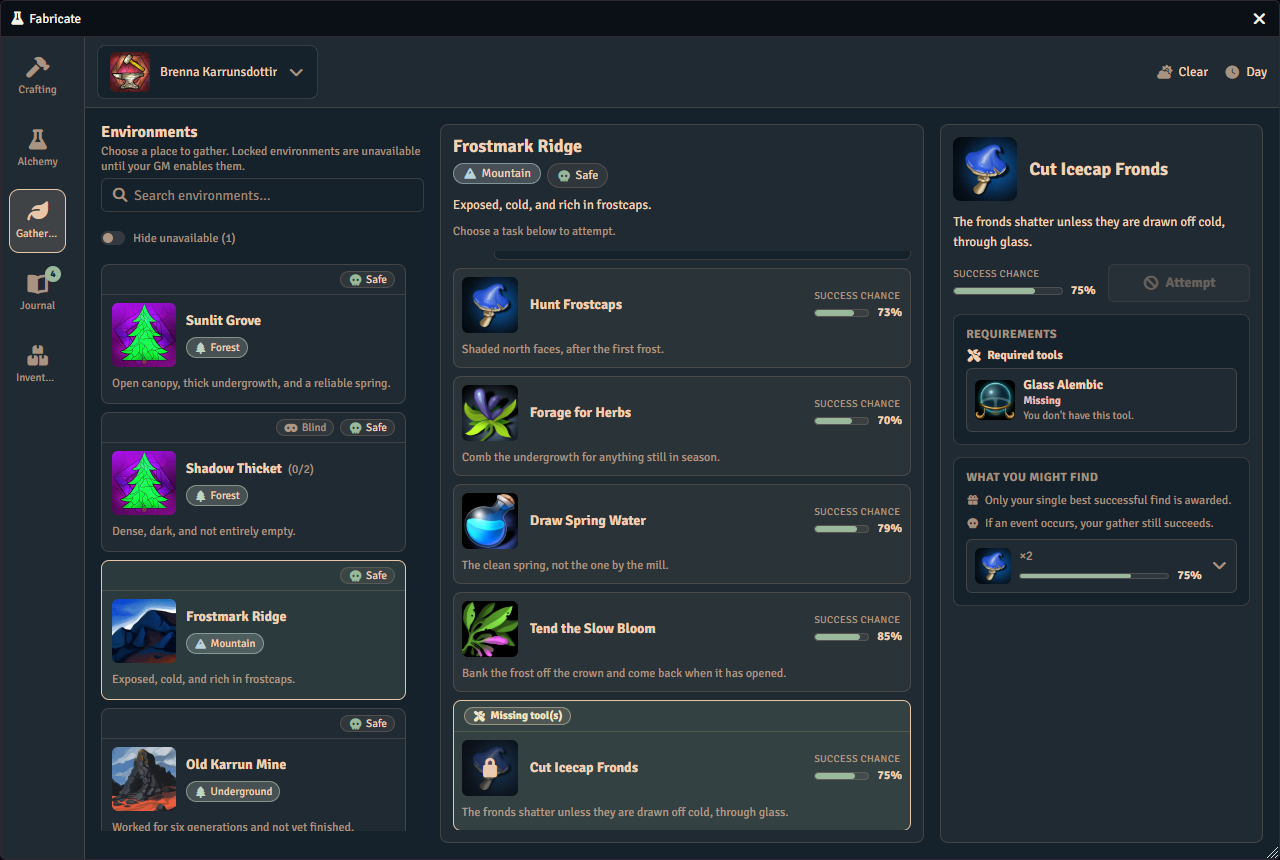
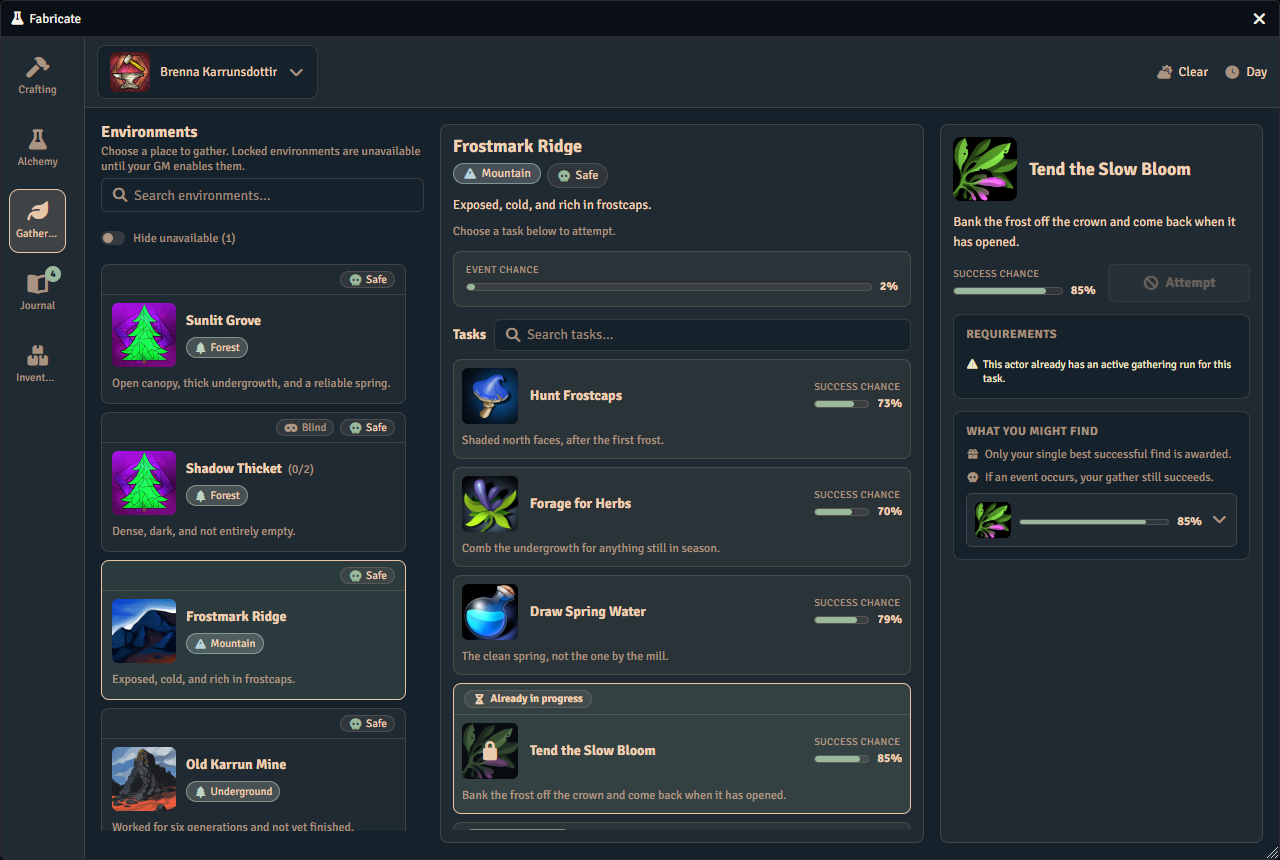
Once enabled, the environment appears in the player Gathering tab for any actor that can gather there. Players open it from the Gathering header button in the Items sidebar, pick a character they own in the actor-selection bar, select an environment, and attempt the tasks available to them.
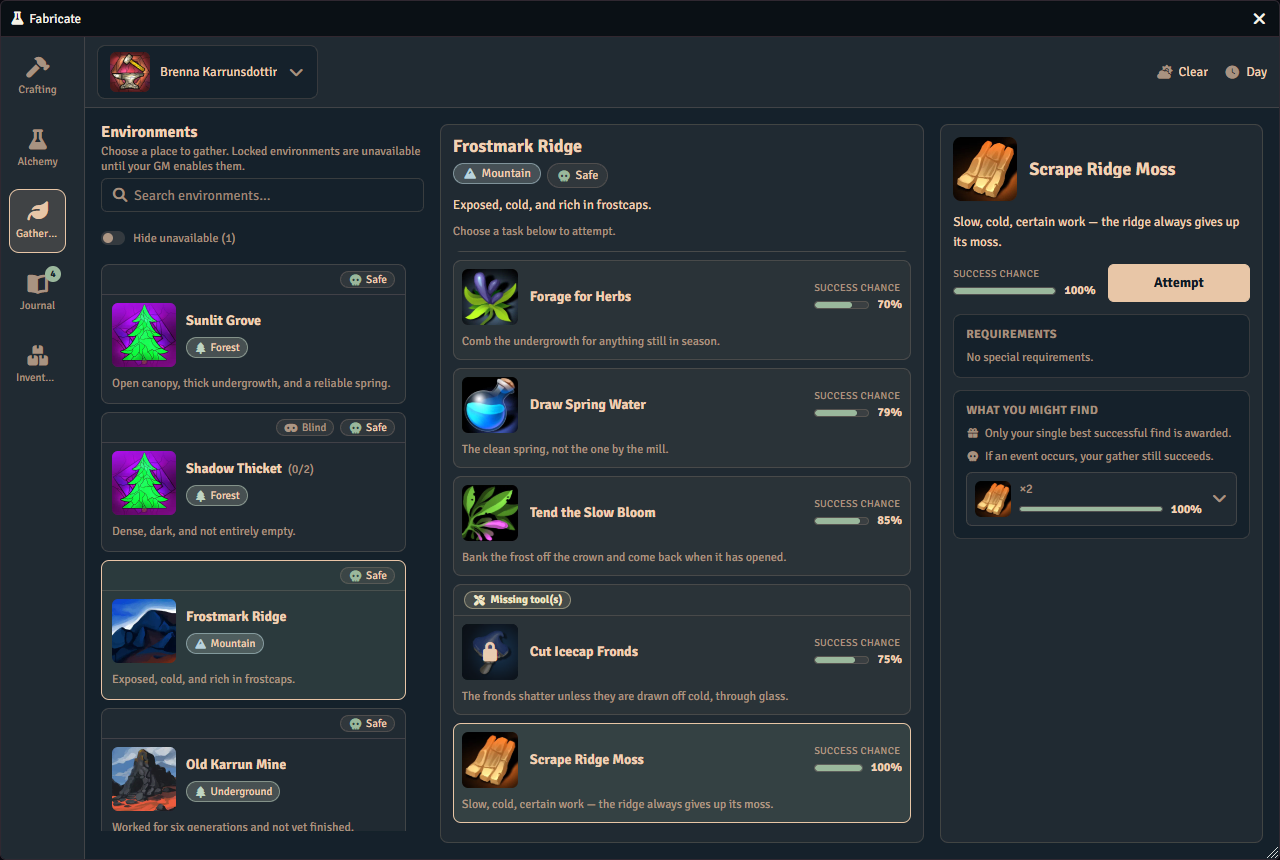
The same player surface shows why an attempt is blocked. For example, a required Tool appears in the right-hand requirements panel when the selected actor does not have it.
Timed tasks stay visible while the active run is in progress, and blind environments show a single opaque gather action until tasks are discovered.
The Crafting tab provides recipe browsing, actor and source selection, craft buttons, favourites, and shopping-list planning in the UI.
See Also
- Crafting Systems covers resolution modes, features, and system configuration
- Recipes covers ingredient sets, result groups, recipe authoring, and player crafting
- API Reference is the full developer documentation
- Troubleshooting has solutions for common setup issues